Twitter has a verification problem — driven by the fact that people can now pay for blue ticks. Here’s how to spot accounts that are actually verified amongst those who have just paid $8 for Twitter Blue.
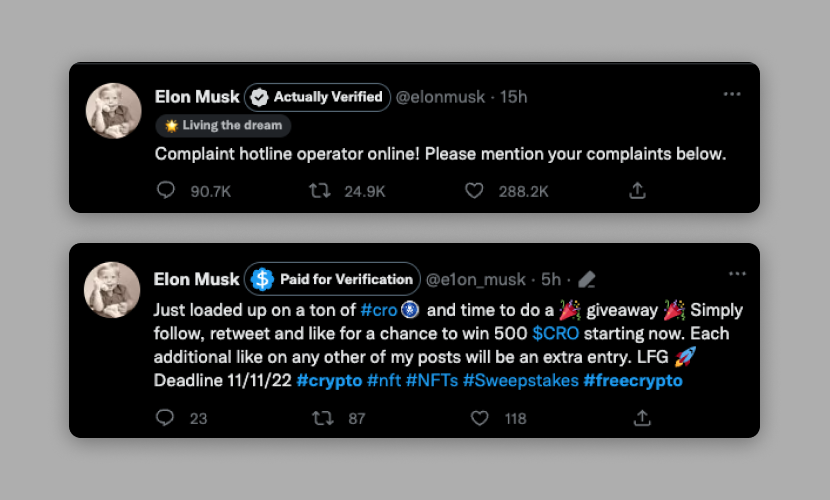
Elon Musk’s plans have been clear from the start, to allow people to pay for the checkmark, which has fundamentally changed what being “verified” actually means and has driven countless fake profiles with ticks and deepened the parody problem that Musk seems to really hate right now.
I mean sure, my colleague Kimberly Gedeon has written a guide on how to get verified using Twitter Blue, but while most people mean well in their purchase, there are a lot of bad actors out there using them to troll relentlessly.
At first, it was funny (I did chuckle at Mario flipping the bird from an “official” Nintendo account), but now there are some examples of people imitating medical companies and dishing out fake advice. Another option could be to set up a Mastodon account, but I can appreciate people wanting to stick to Twitter.
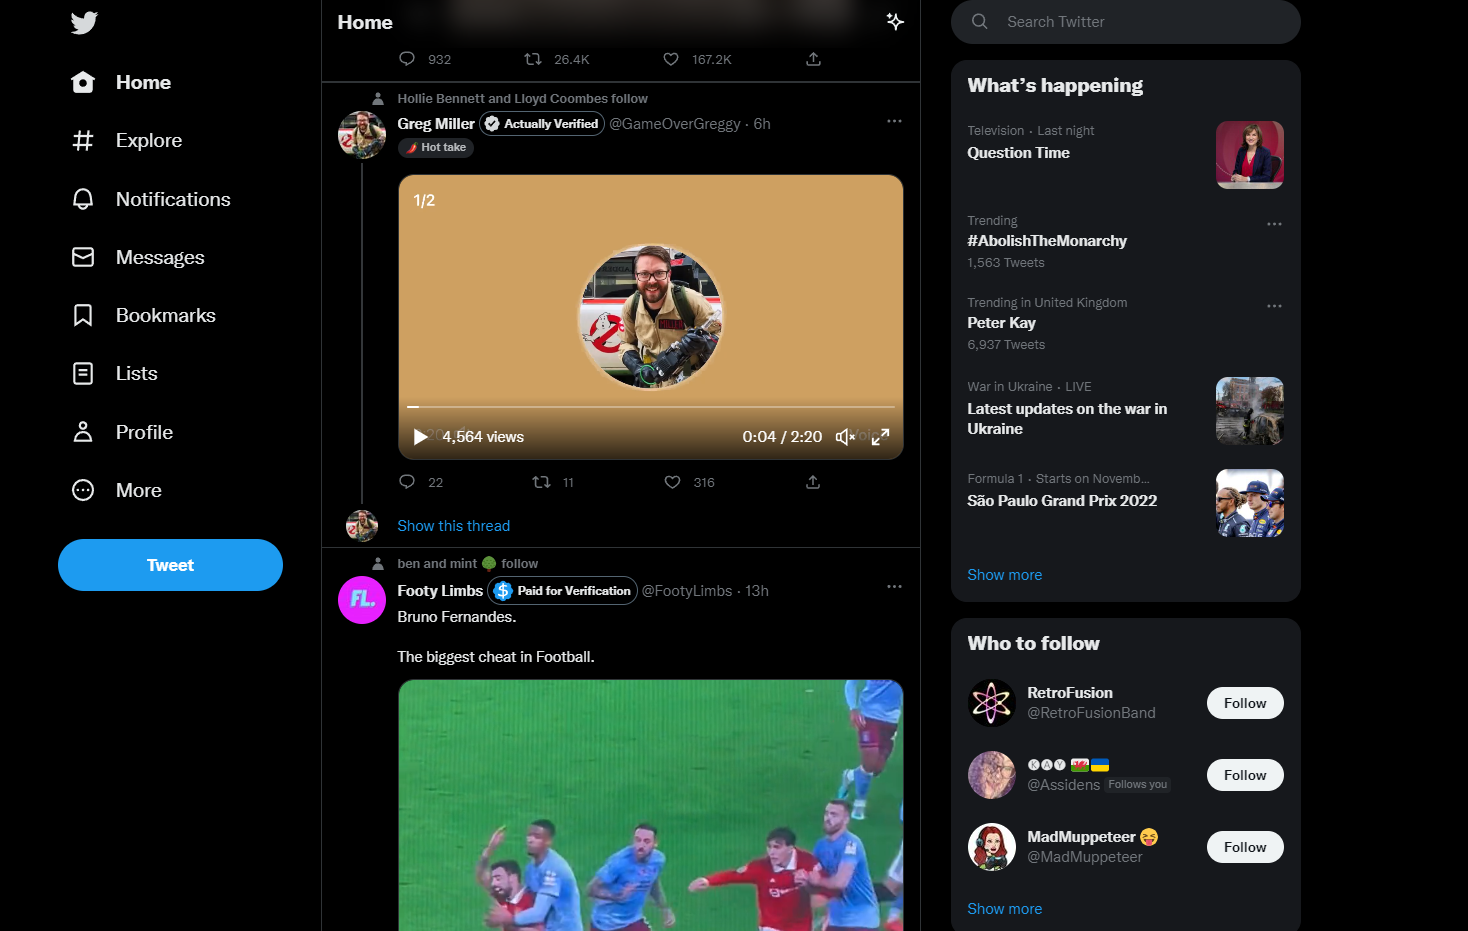
That’s why we’ve set up a handy guide to help you identify which accounts are verified for real, and which have just paid for the pleasure. One of these methods includes a really handy Chrome extension that does all the work for you.
How to spot real verified accounts (the official method)
The official way is actually pretty quick to do on both mobile and desktop.
1. Go to the Twitter profile you wish to check.
2. Tap the tick and you’ll see a dialogue box explaining how the account is verified.
How to spot real verified accounts (the unofficial, but quicker method)
This takes a little work at first to install a Chrome extension simply named “Eight Dollars,” but once done, it makes the process of weeding out the paid ticks so much easier.
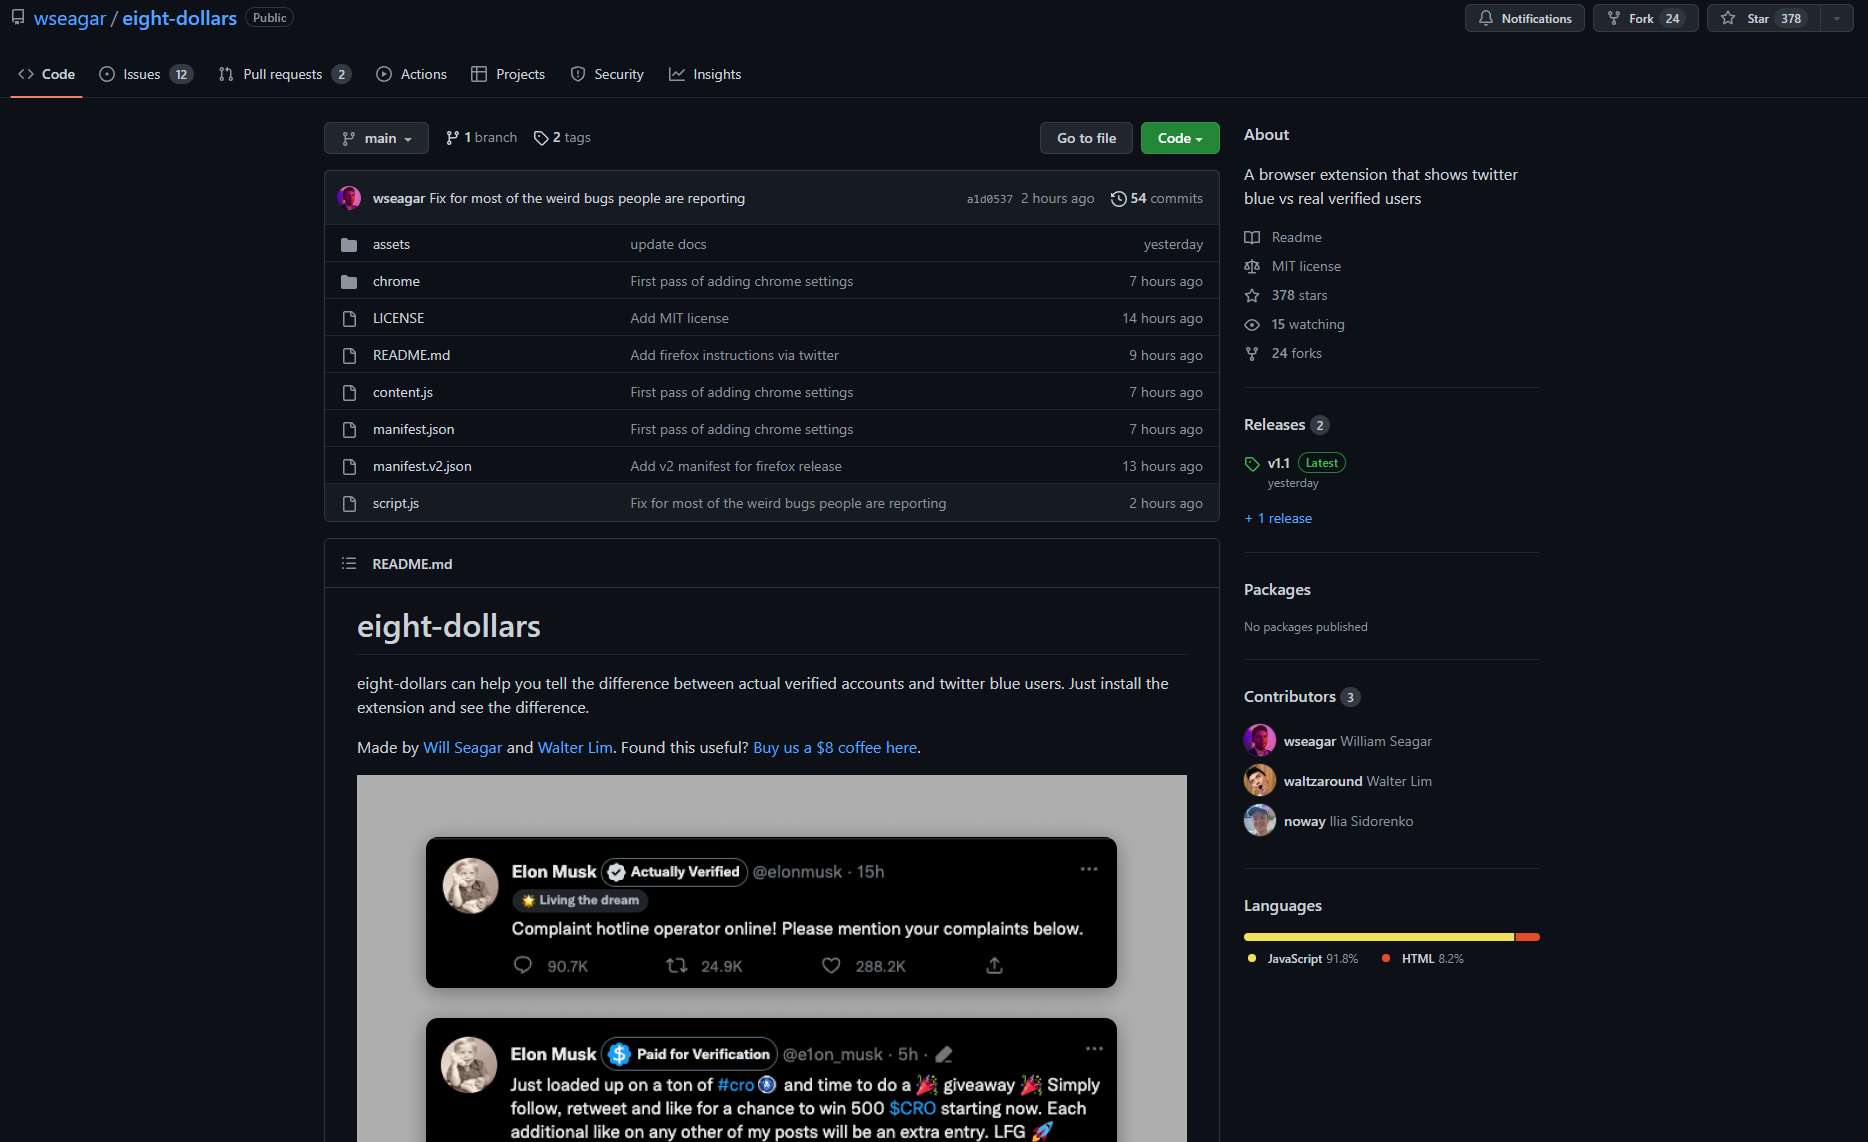
1. Head over to the extension’s GitHub page and download the extension.
2. Once downloaded, unzip the folder.
3. Open a new tab in Google Chrome and visit chrome://extensions.

4. Flick the Developer mode switch in the top right corner to on and click Load unpacked.
5. Select the unzipped folder and when added, make sure the extension is enabled.

6. After this, you can turn off Developer mode and when you go to Twitter, you’ll start to see “actually verified” and “paid for verification” labels.
