When you buy a Mac, it comes with a default language and time zone setting based on where you bought it. These settings are not fixed. You can easily add multiple languages or just your native tongue if you’d prefer to use that instead.
You can also change the language temporarily for things like presentations, or to further familiarize yourself with another language that you’re practicing. And it’s not just system files and default settings — the language flexibility extends to the apps you use as well.
How to change the language on a Mac
Changing the language on a macOS device is as easy as 1-2-3. Keep in mind, however, that you’ll need to restart your Mac for the new changes to take effect.
1. Click the Apple icon to open the menu.
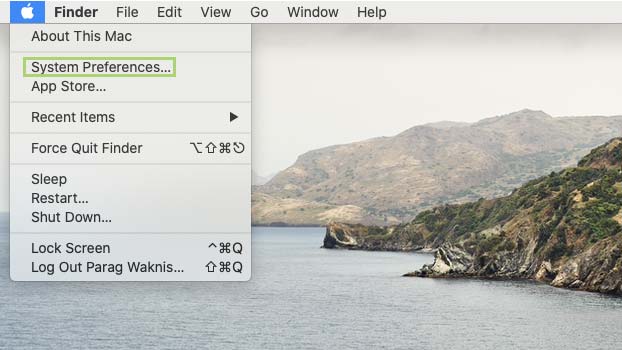
2. In the menu, select System Preferences.
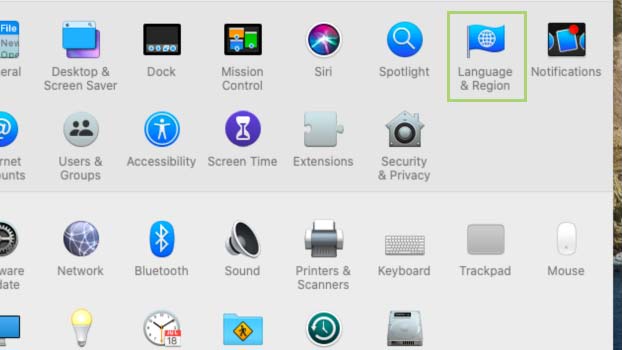
3. In System Preferences, select Language & Region.
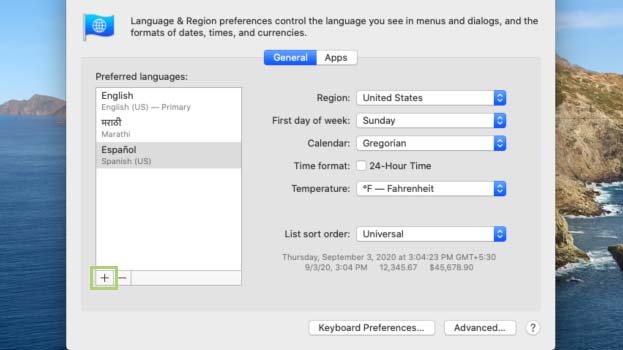
4. Click the + sign under Prefered Languages on the right.
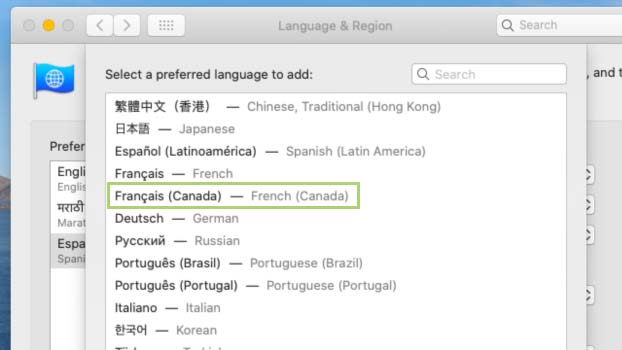
5. From the list that pops up, select the language you would like to add.
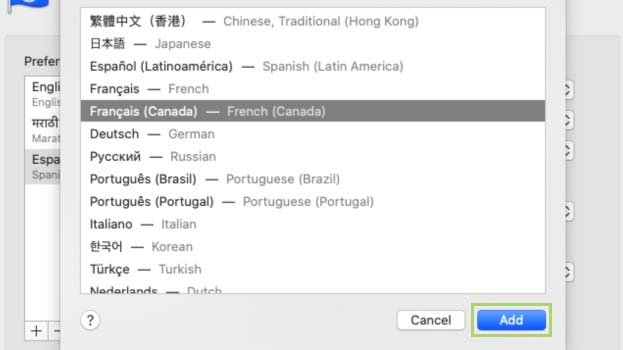
6. With the language selected, click Add.
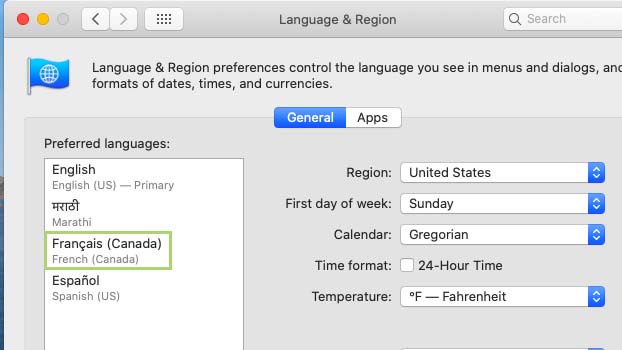
7. Drag the new language to the top spot to make it the Primary language.
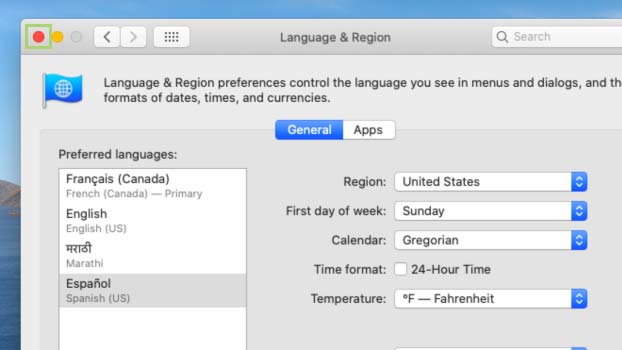
8. Click X to close the Language and Region Preferences.
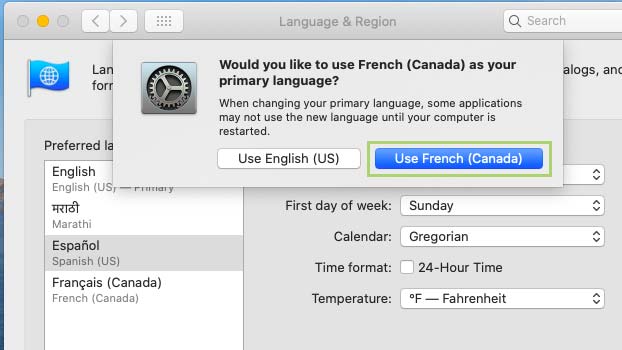
9. In the dialogue box that opens, click Use French (Canada). In your case it will be the language you selected.
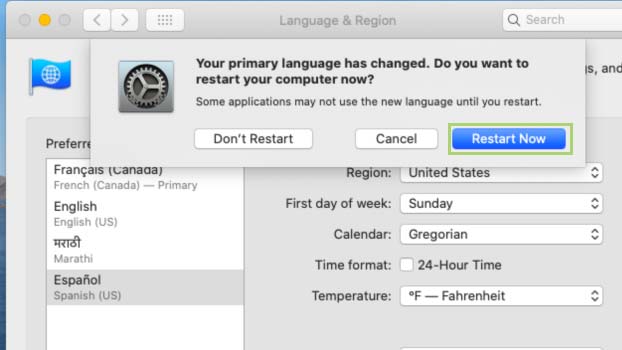
10. When prompted to restart, click Restart.

