“How to add signature in Outlook” is currently trending on Google Search as users of the popular Microsoft email app scratch their heads on how to add end-of-email blocks of text.
Signatures add a sweet dose of professionalism to your emails, and it gives recipients information about who you are, what you do, and how to contact you. That being said, if you have no idea how to add a signature to Outlook, you’ve come to the right place. Check out our step-by-step tutorial below.
How to add signature in Outlook
First, in order to add a signature in Outlook, you must have a Microsoft 365 subscription. If you can’t afford to purchase a subscription, check out Microsoft’s 30-day free trial (opens in new tab) so that you can make the appropriate changes without paying a fee.
Once you’re all signed up for a Microsoft 365 plan, follow the instructions below to add a signature in Outlook.
1. Open the Microsoft Outlook app.
2. Go to File in the top-right corner.
3. Click on Options.
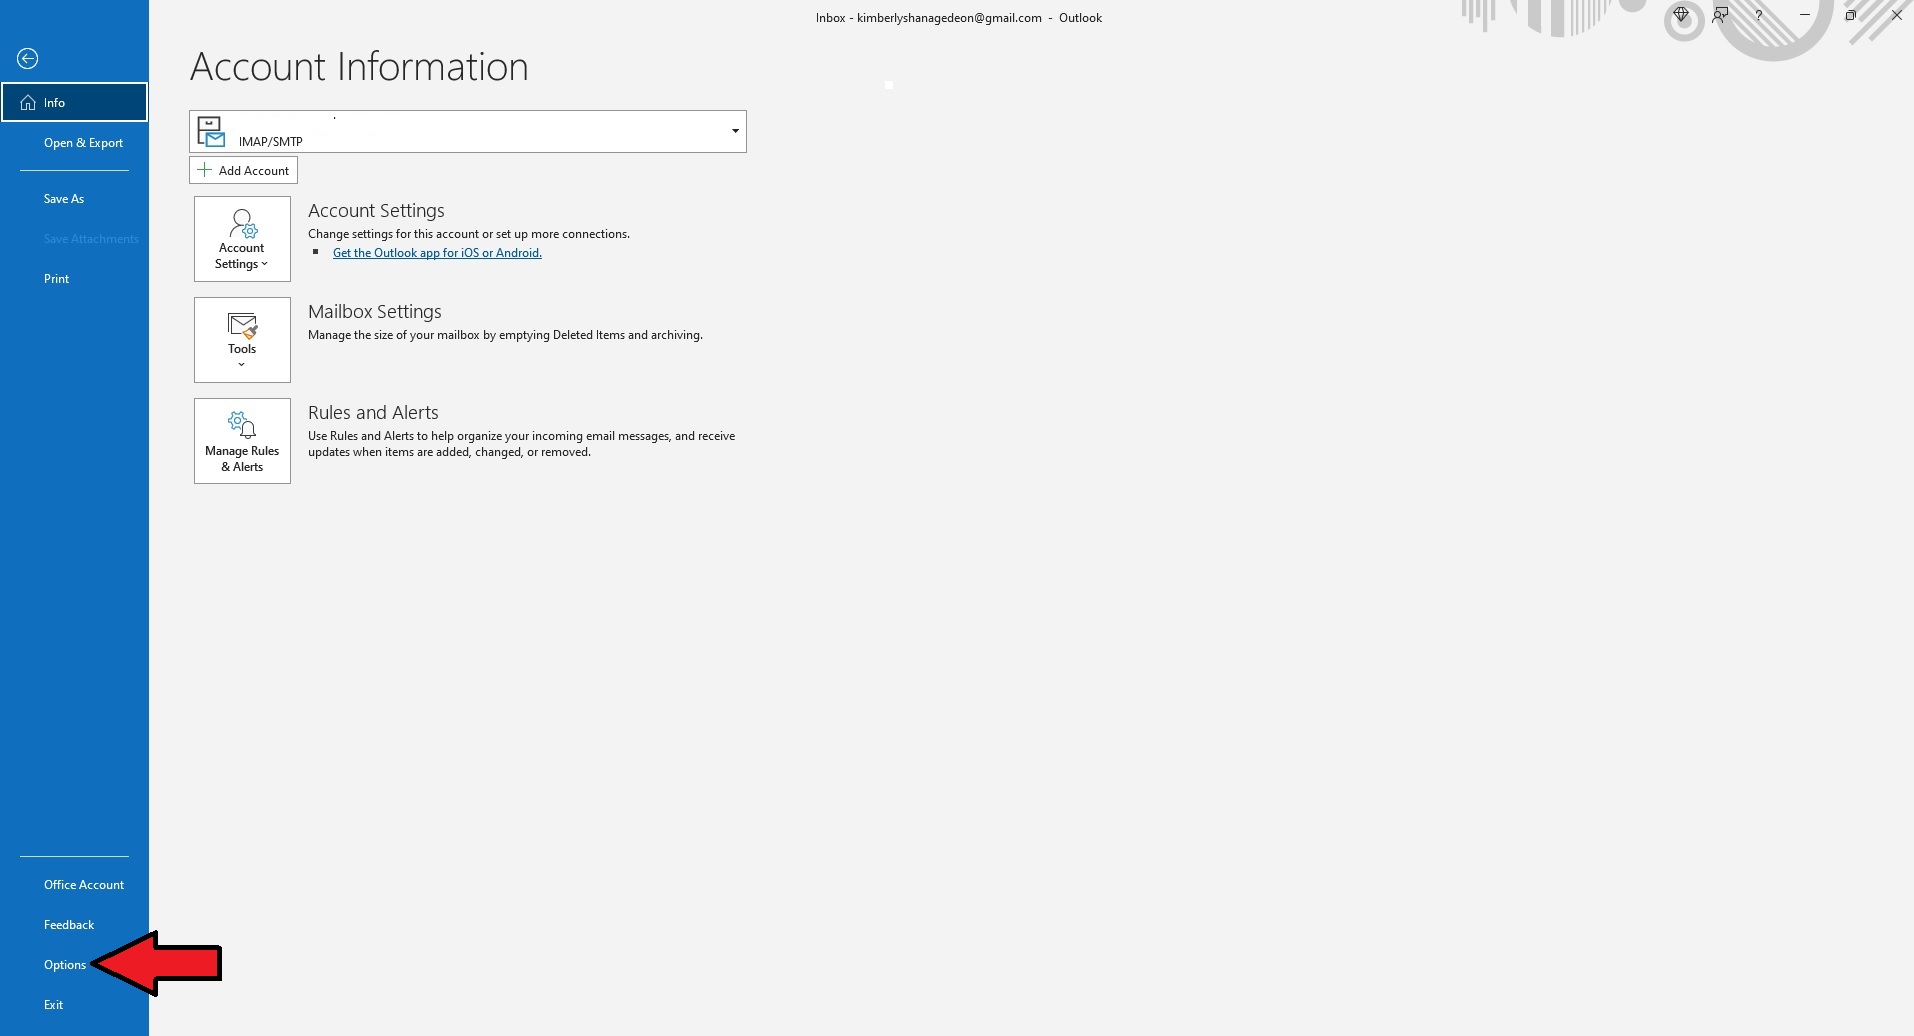
4. Go to Mail followed by Signatures.
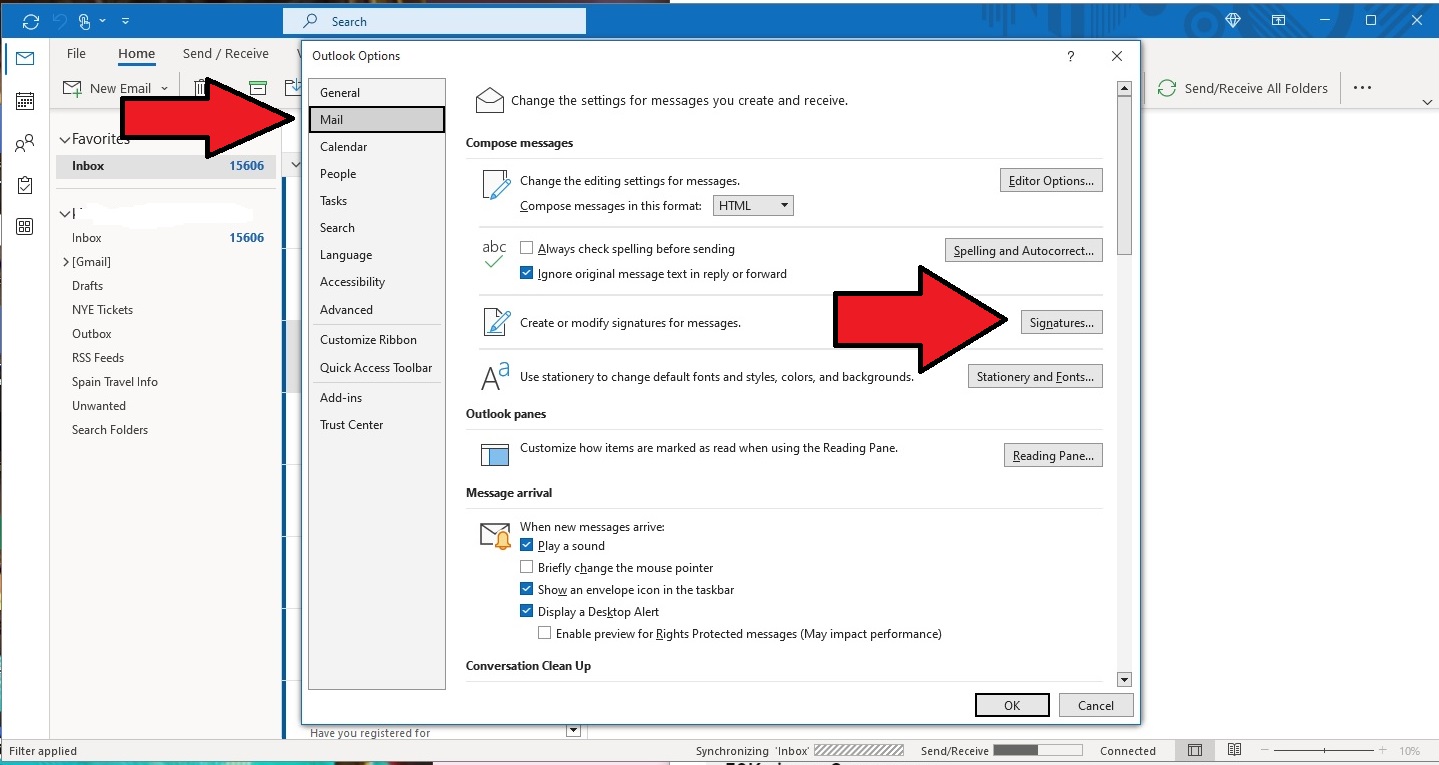
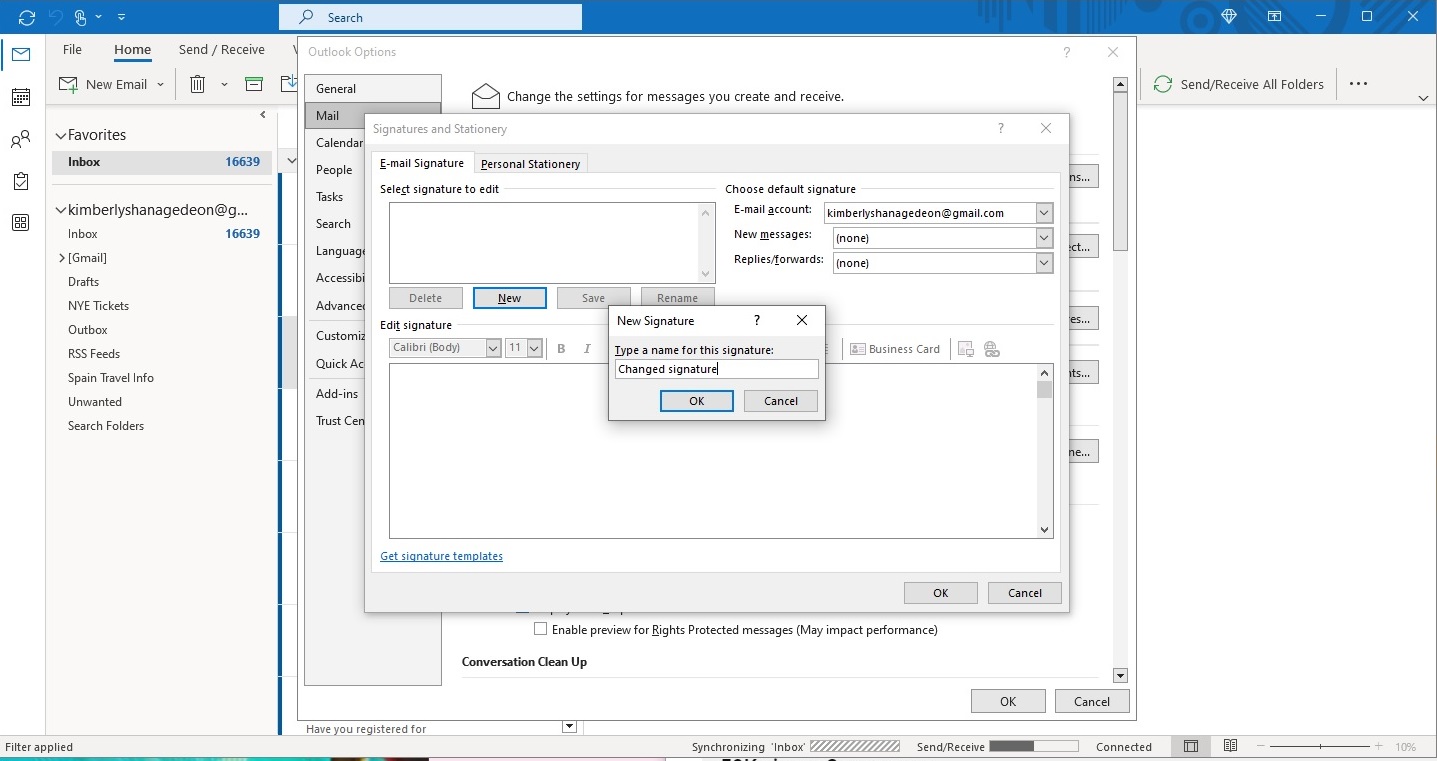
5. Tap New to give your signature a title. Click OK.
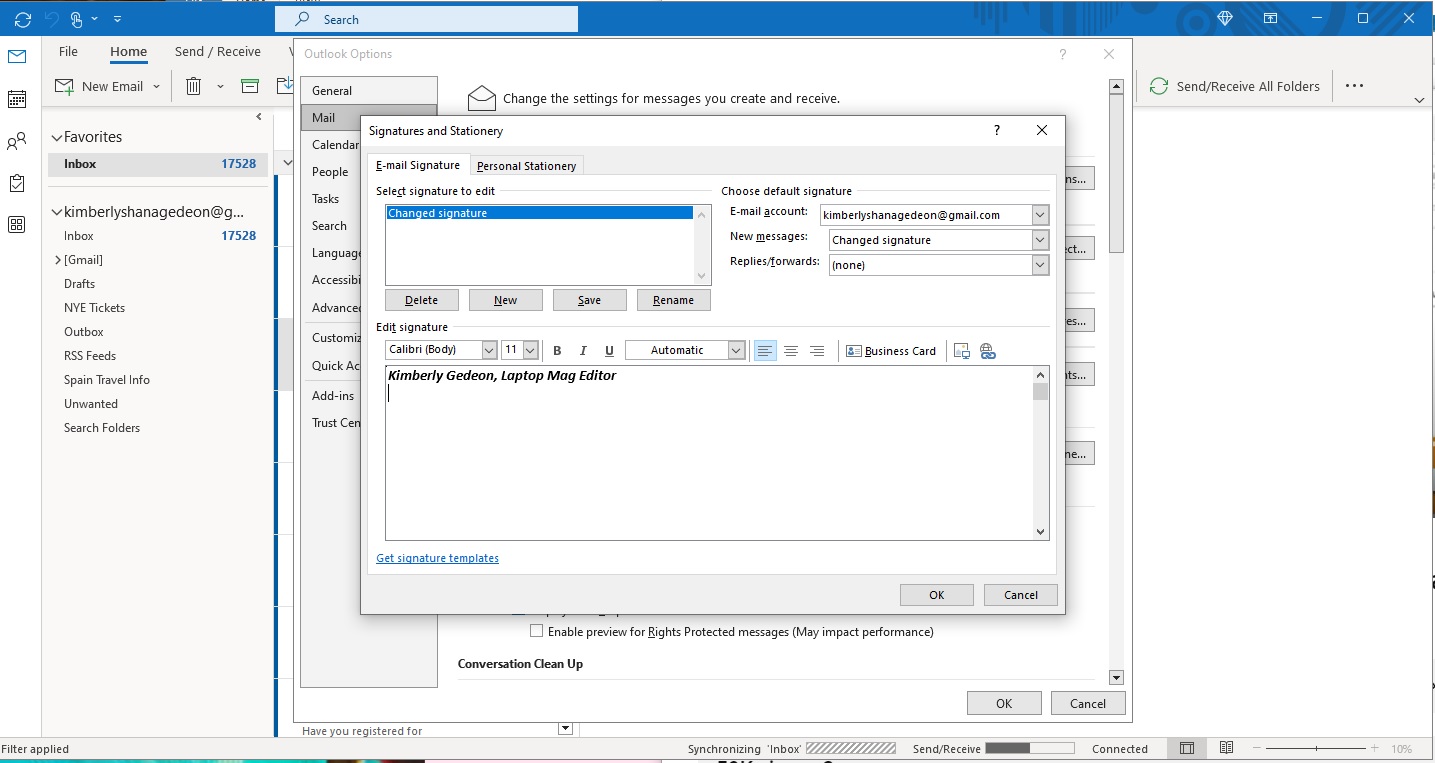
6. In the Edit Signature field, type add in your signature.
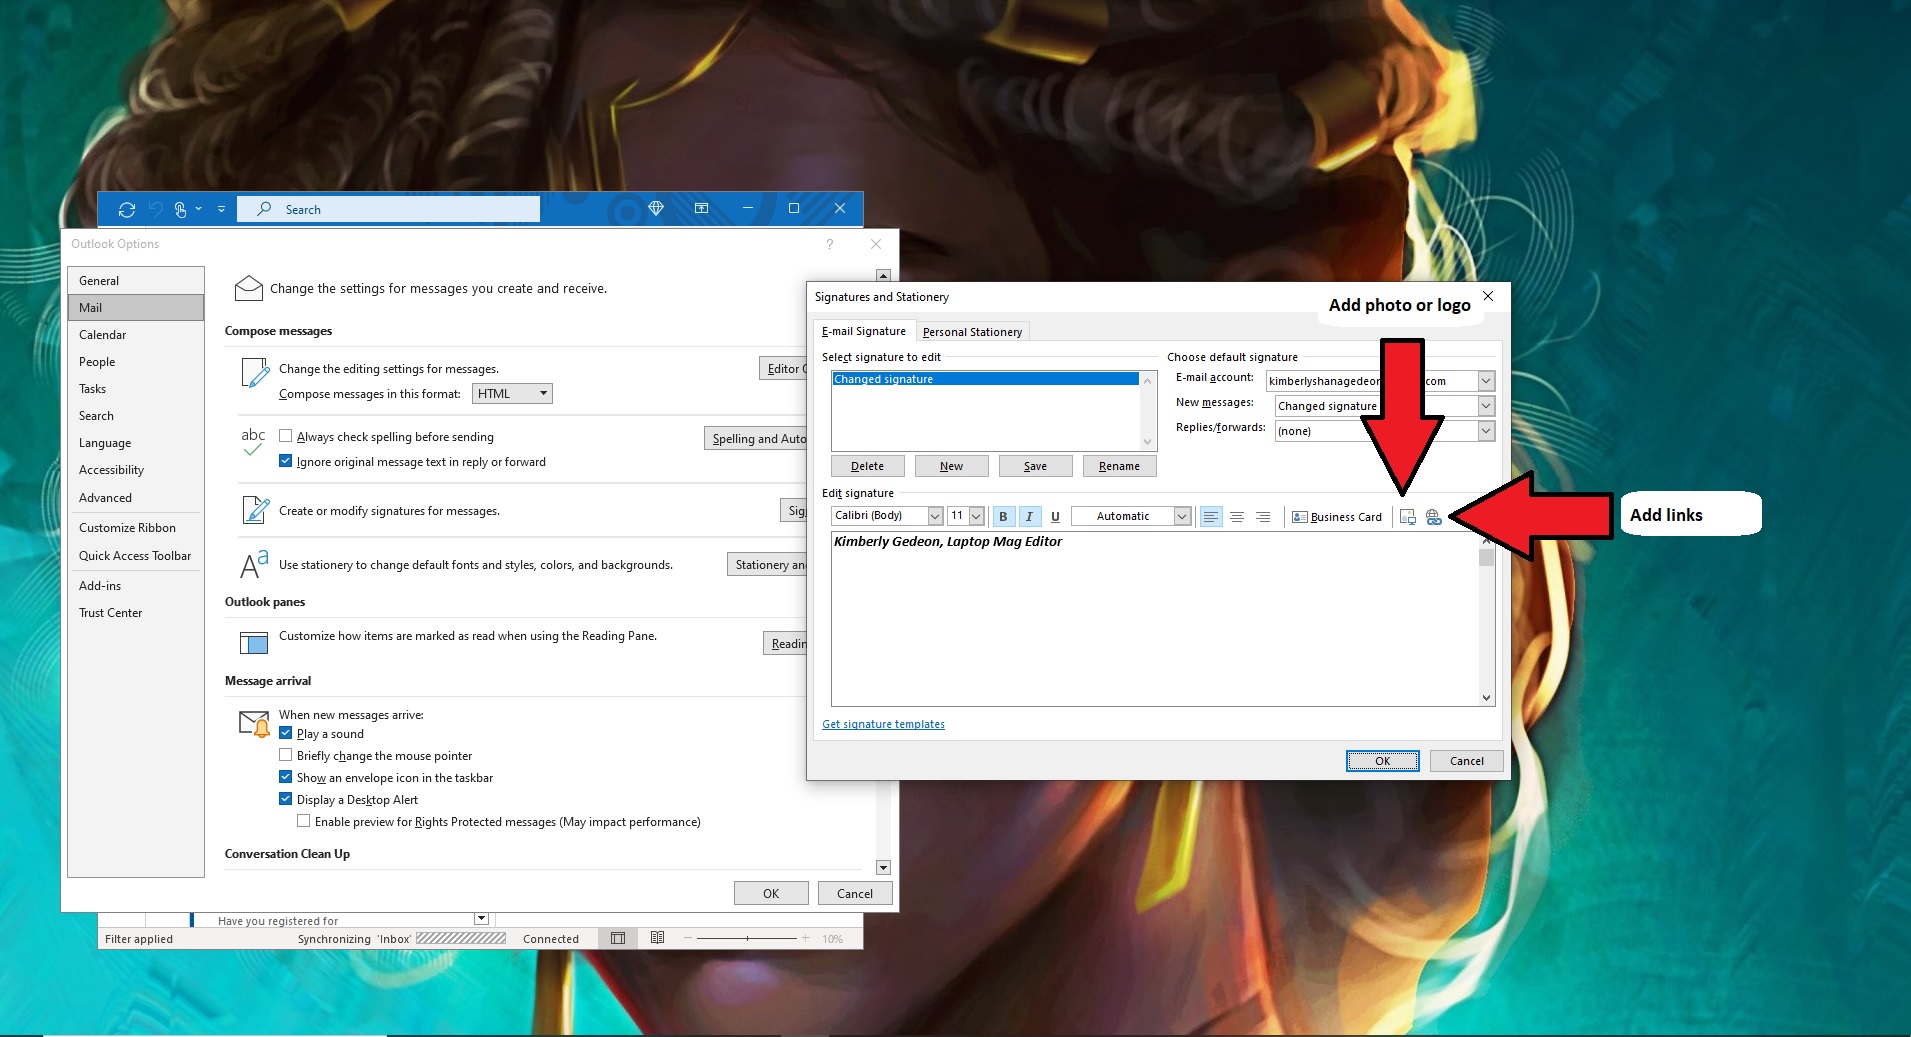
7. You can add logos and links by clicking on the icons labeled below.
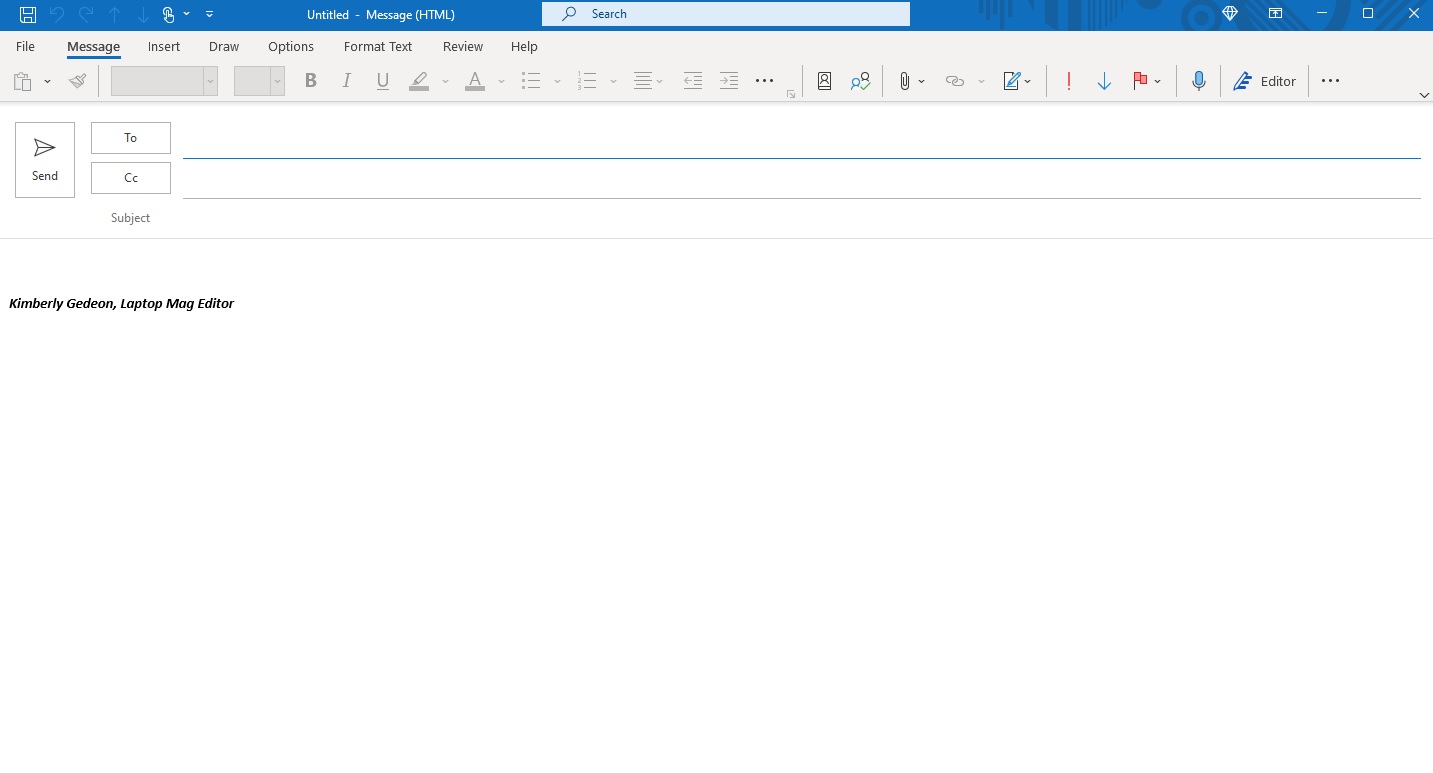
To double-check how your newly added signature looks to recipients, click on New Email.
Pro tip: If you want a more sophisticated look to your signature, consider downloading pre-made Microsoft signature templates here. (opens in new tab)

