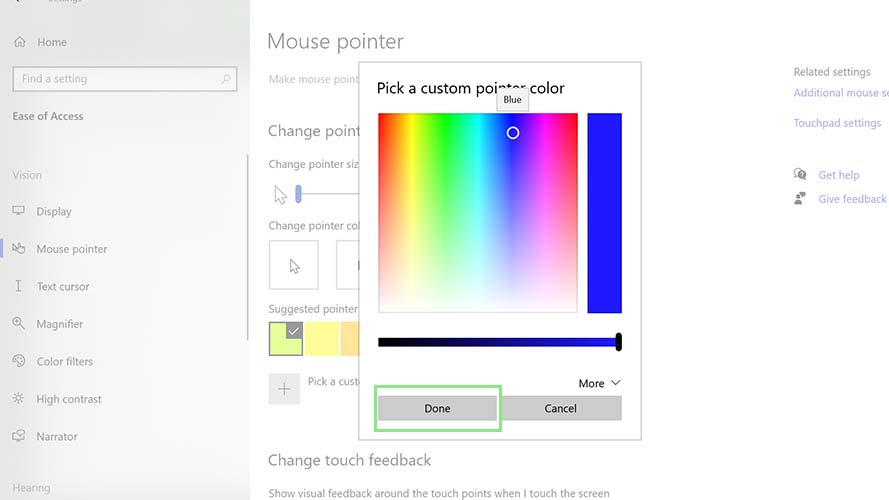
It’s not surprising that we spend the bulk of our time moving a mouse around on our PCs. What is surprising is that few people know about some of the built-in customization options on display to change the appearance of mouse-related things, like cursor size and color. Today, we’re going to look at how to customize the appearance of your mouse cursor by changing its color.
Adding a bit of color is a fun addition that makes things feel new and fresh, especially if you want to give your laptop a personal touch. While you’re in this menu, you can also change things like the pointer icon, scroll speed, and cursor size.
Here’s how it’s done.
How to change your mouse cursor color
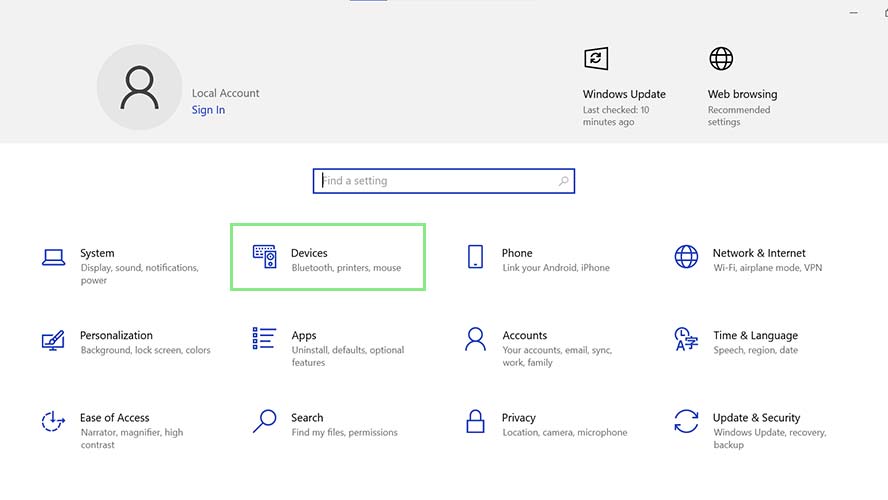
1. To change your mouse cursor’s color, open Windows Settings by right-clicking the Start icon and selecting Settings.
2. Next, select Devices from the Settings window. This will direct you to Windows’ array of device settings.
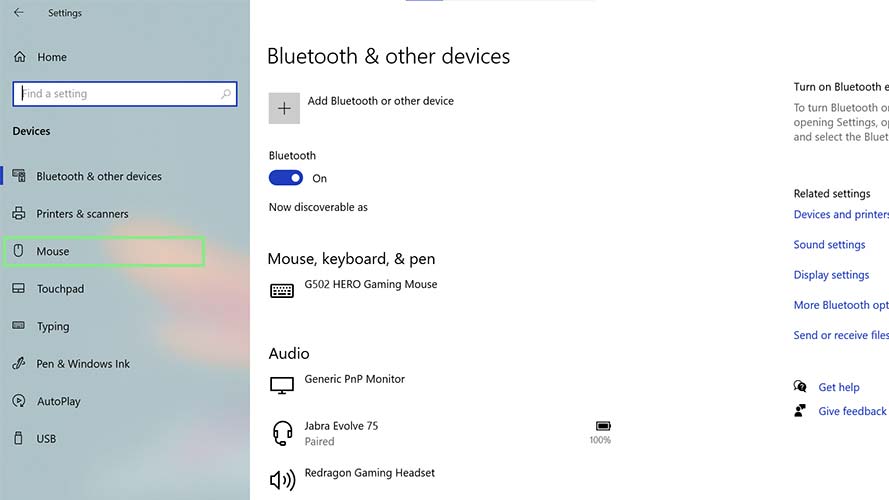
3. On the left side navigation pane, select Mouse.
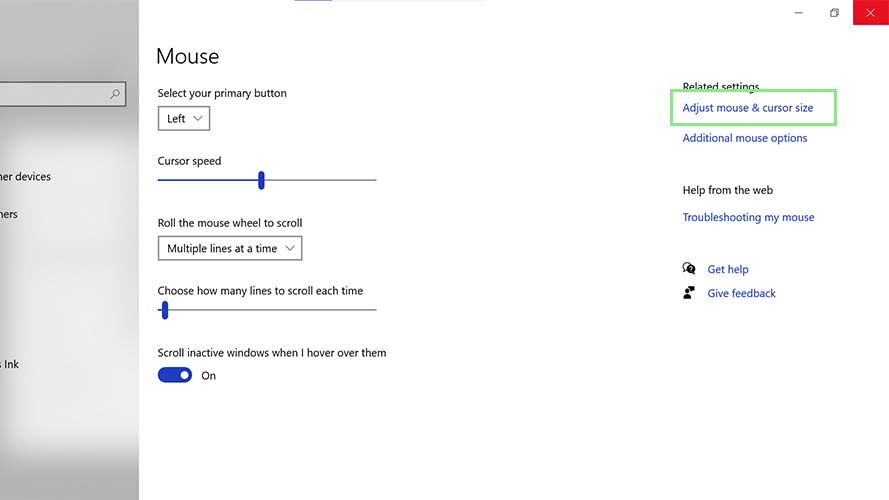
4. Under the Related settings section of the Mouse page, click Adjust mouse & cursor size. This section can be found in the upper-right portion of the Mouse page.
5. Under the Change pointer color section, choose from the four options provided, namely White, Black, Inverted, and Custom. If you select Custom, some suggested colors should appear beneath. Select the color that you want from the suggestions.
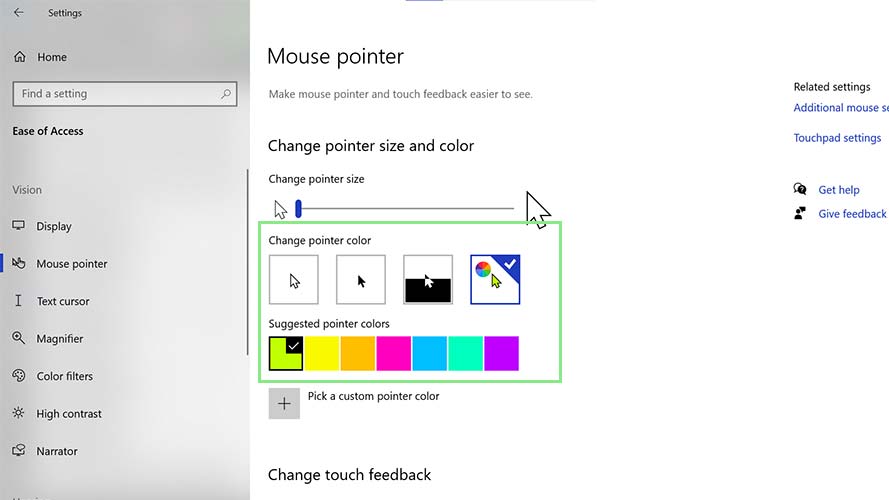
6. If your preferred color is not among the suggestions, select Pick a custom color pointer. A color picker window that lets you select any color you want should appear.
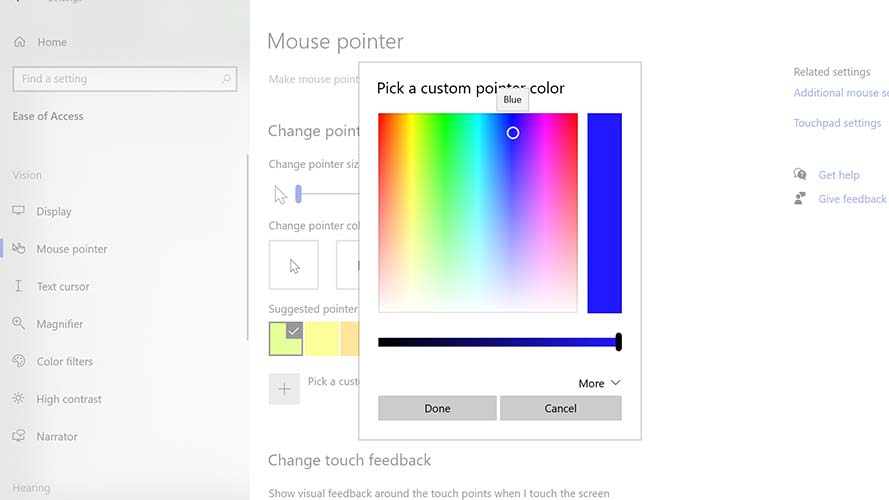
7. Select the color that you want for your cursor and click Done.
