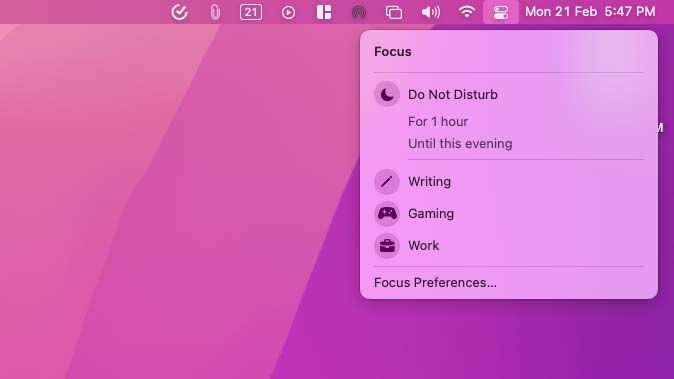
We wear a lot of hats throughout the day and so do our gadgets. While working, you don’t want to get pulled away from what you’re doing by constant notifications and reminders popping up on your iPhone. At home, you mute updates from your job to stay in the moment with your family. We also use a different set of apps depending on where we are. With the Focus tool on your iPhone, iPad, and MacBook, your devices can automatically adapt to these various roles.
Think of Focus as a customizable Do Not Disturb mode. You can create as many Focus profiles as you want — one for every activity, such as work, play, gym, and more. You can personalize each profile to set who can contact you when it’s active and which apps are available on the Home Screen. Here’s how to use Focus on your iPhone, iPad, and Mac.
Set up Focus profiles on iPhone and iPad
To set up a new Focus profile on your iPhone or iPad, first, make sure it’s running the latest iOS 15 or iPadOS 15 updates. You can check for updates from Settings > General > Software Update.
Next, navigate to Settings > Focus. Your device will be pre-configured with four profiles already. You can either edit these to your preferences or tap the plus button at the top right corner.
Create a new Focus profile on iPhone and iPad
If you choose the plus option, you’re asked to name the profile on the next step. Tap “Custom” to build a Focus profile from scratch or pick from a handful of existing presets for activities like “Gaming” and “Reading.” These presets are already tuned to what you might use them for, and they can even automatically activate based on certain actions. The “Fitness” mode, for instance, kicks in when you fire up a workout on Apple Fitness+.
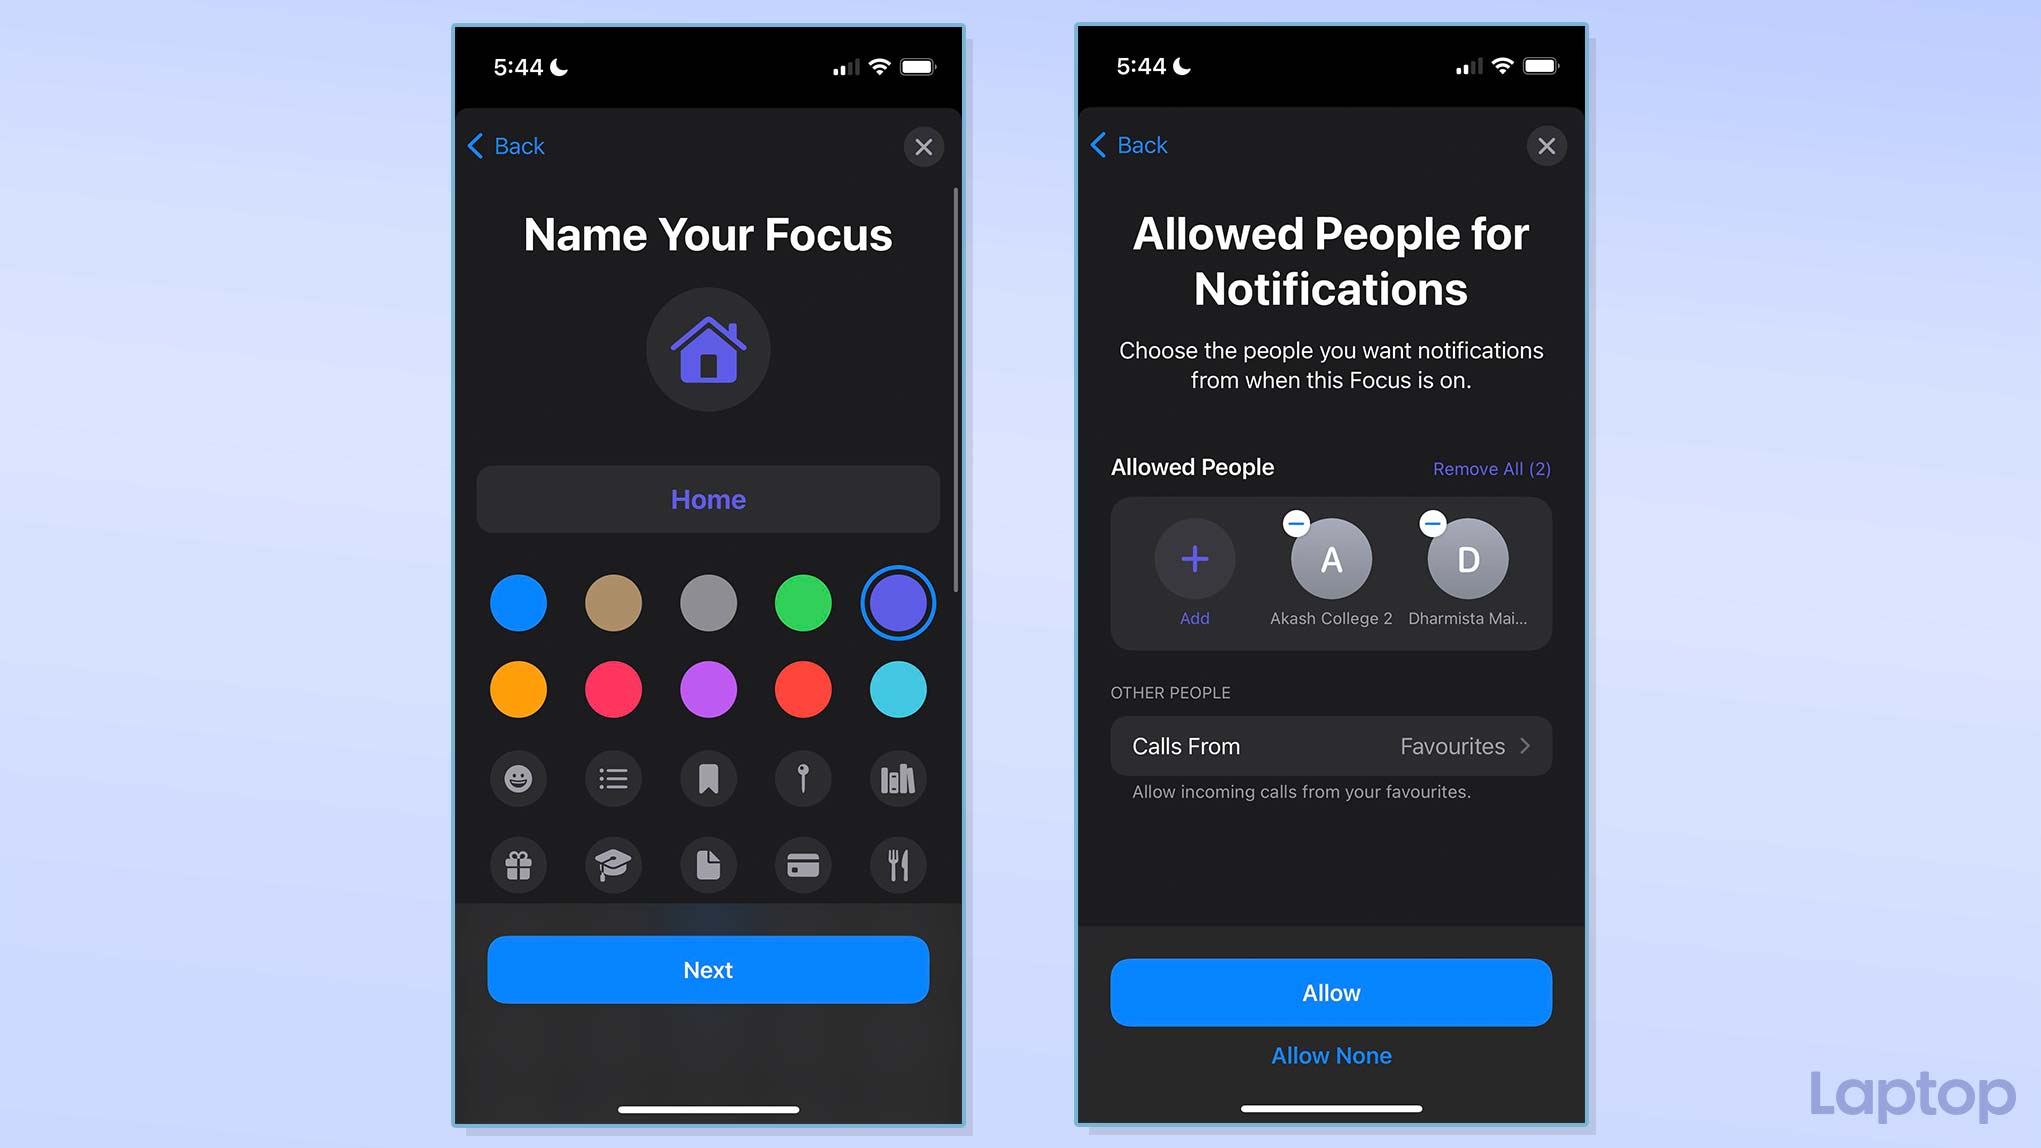
For this tutorial, we’ll go through constructing a fresh Focus profile. So select the “Custom” option under the plus button and on the following page, give it a title. You also need to attach a thumbnail to it, which will appear on your device’s status bar to inform you the mode is active. Hit “Next” to continue.
After that, you can select the people you want notifications from when this Focus is on. This feature is mainly for messaging apps that support iOS 15. Allow a contact in the profile with the “Add” option, and tap “Remove all” to mute alerts from everyone. Apart from texts, you can specify who can call you in this mode with the “Calls From” menu. Touch the “Allow” button to save your preferences.
Next, you have to set up how your profile deals with all app notifications. Add the apps that can notify you in this profile with the “Add” button. If you don’t want any notifications, tap “Remove All.” At the bottom, the “Time Sensitive” toggle lets you mark time-sensitive notifications, such as reminders, as an exception. The rest of the alerts are silenced, and you have the option to check those once you exit this Focus profile. Proceed to create the new Focus profile.
Customize a Focus profile on iPhone and iPad
Now that you have the essentials for your Focus profile out of the way, there are a couple of more ways you can personalize it under the “Options” section.
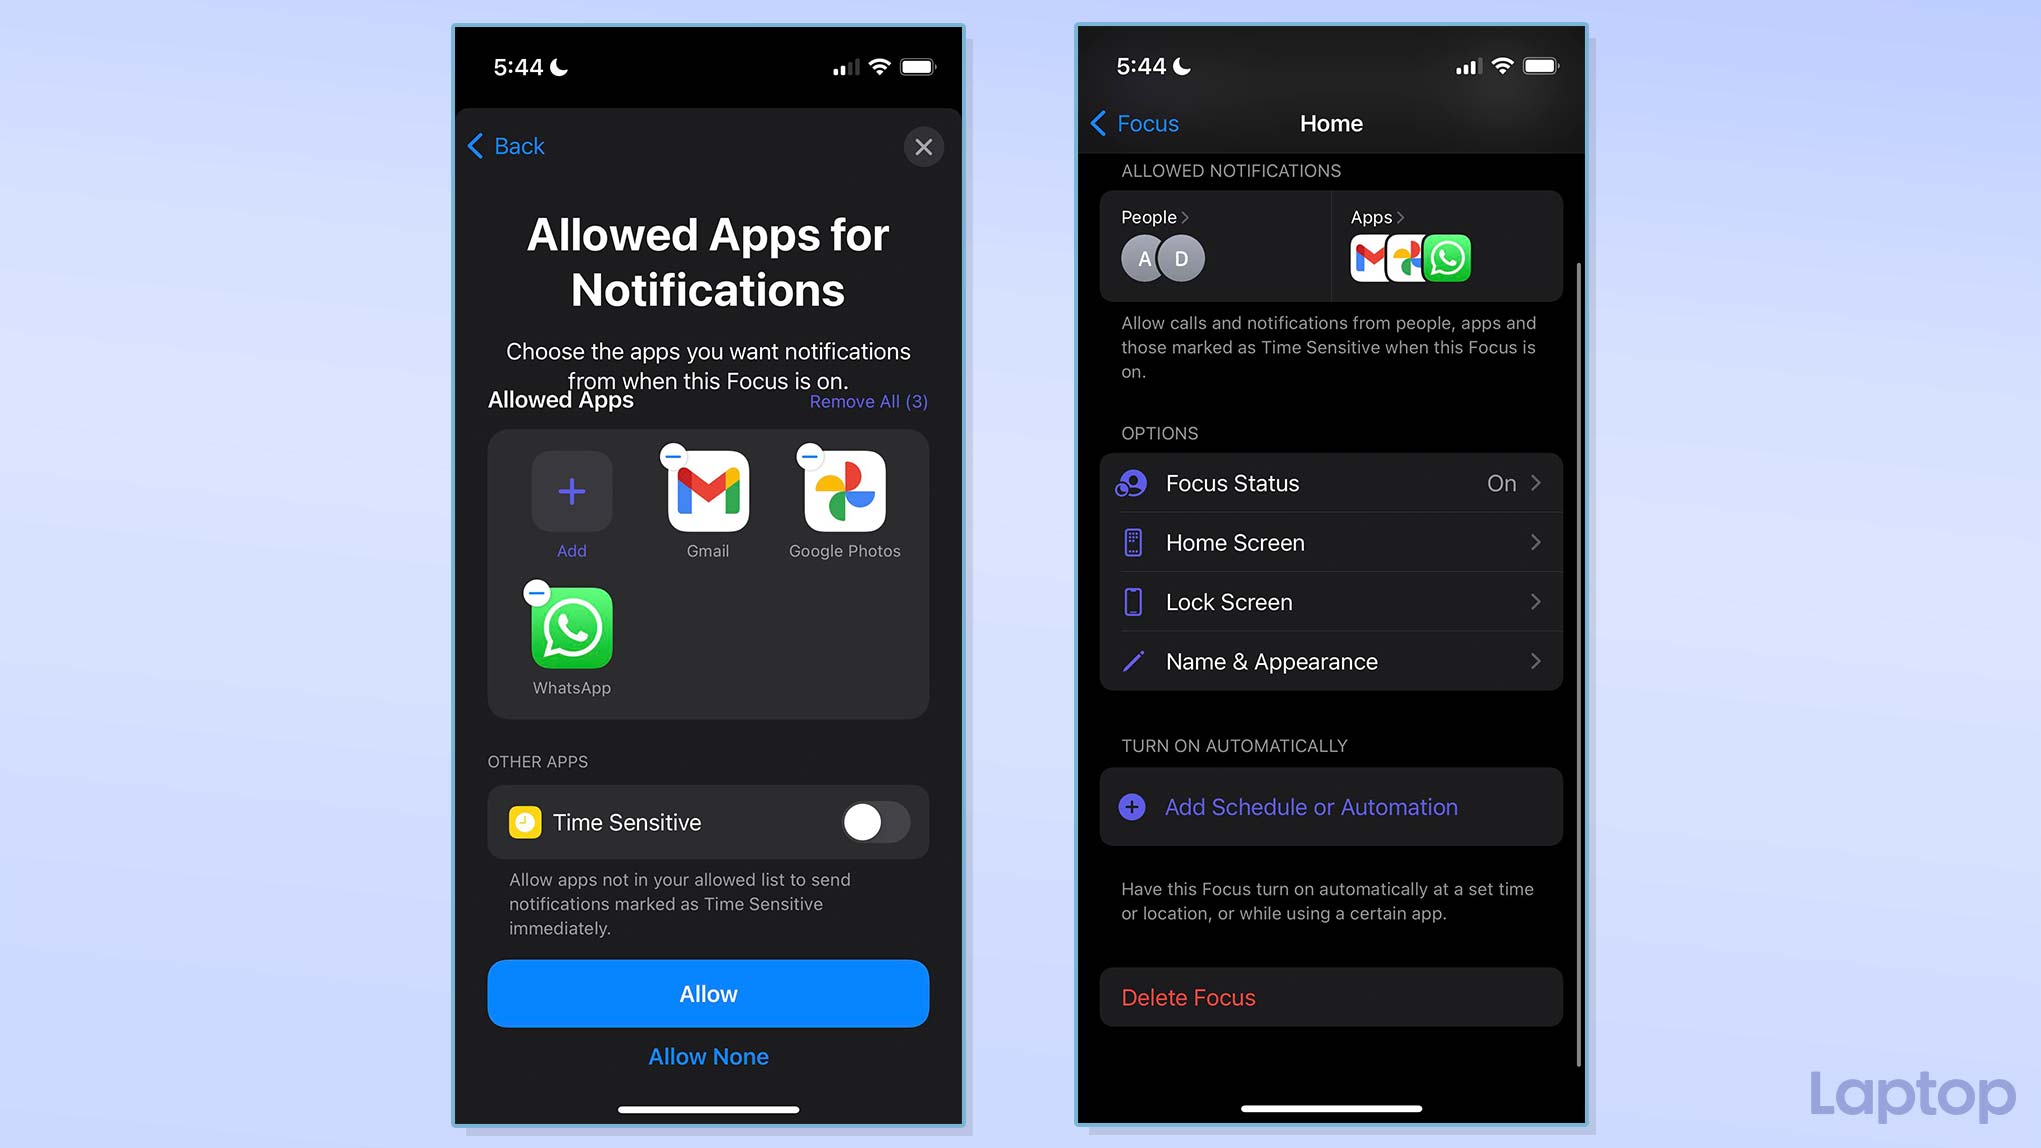
When you switch on “Focus Status,” your device lets the people who are not in your allowed list of contacts know that you have your notifications silenced on compatible apps like iMessage. From “Home Screen,” you can choose which pages appear when this profile is activated and whether icons show notification badges.
Enable and schedule a Focus profile on iPhone and iPad
There are two methods to activate a Focus profile: you can either automate it or manually turn it on yourself. For the latter, pull down the Control Center, press and hold the “Do Not Disturb” tile, and tap your profile’s name.
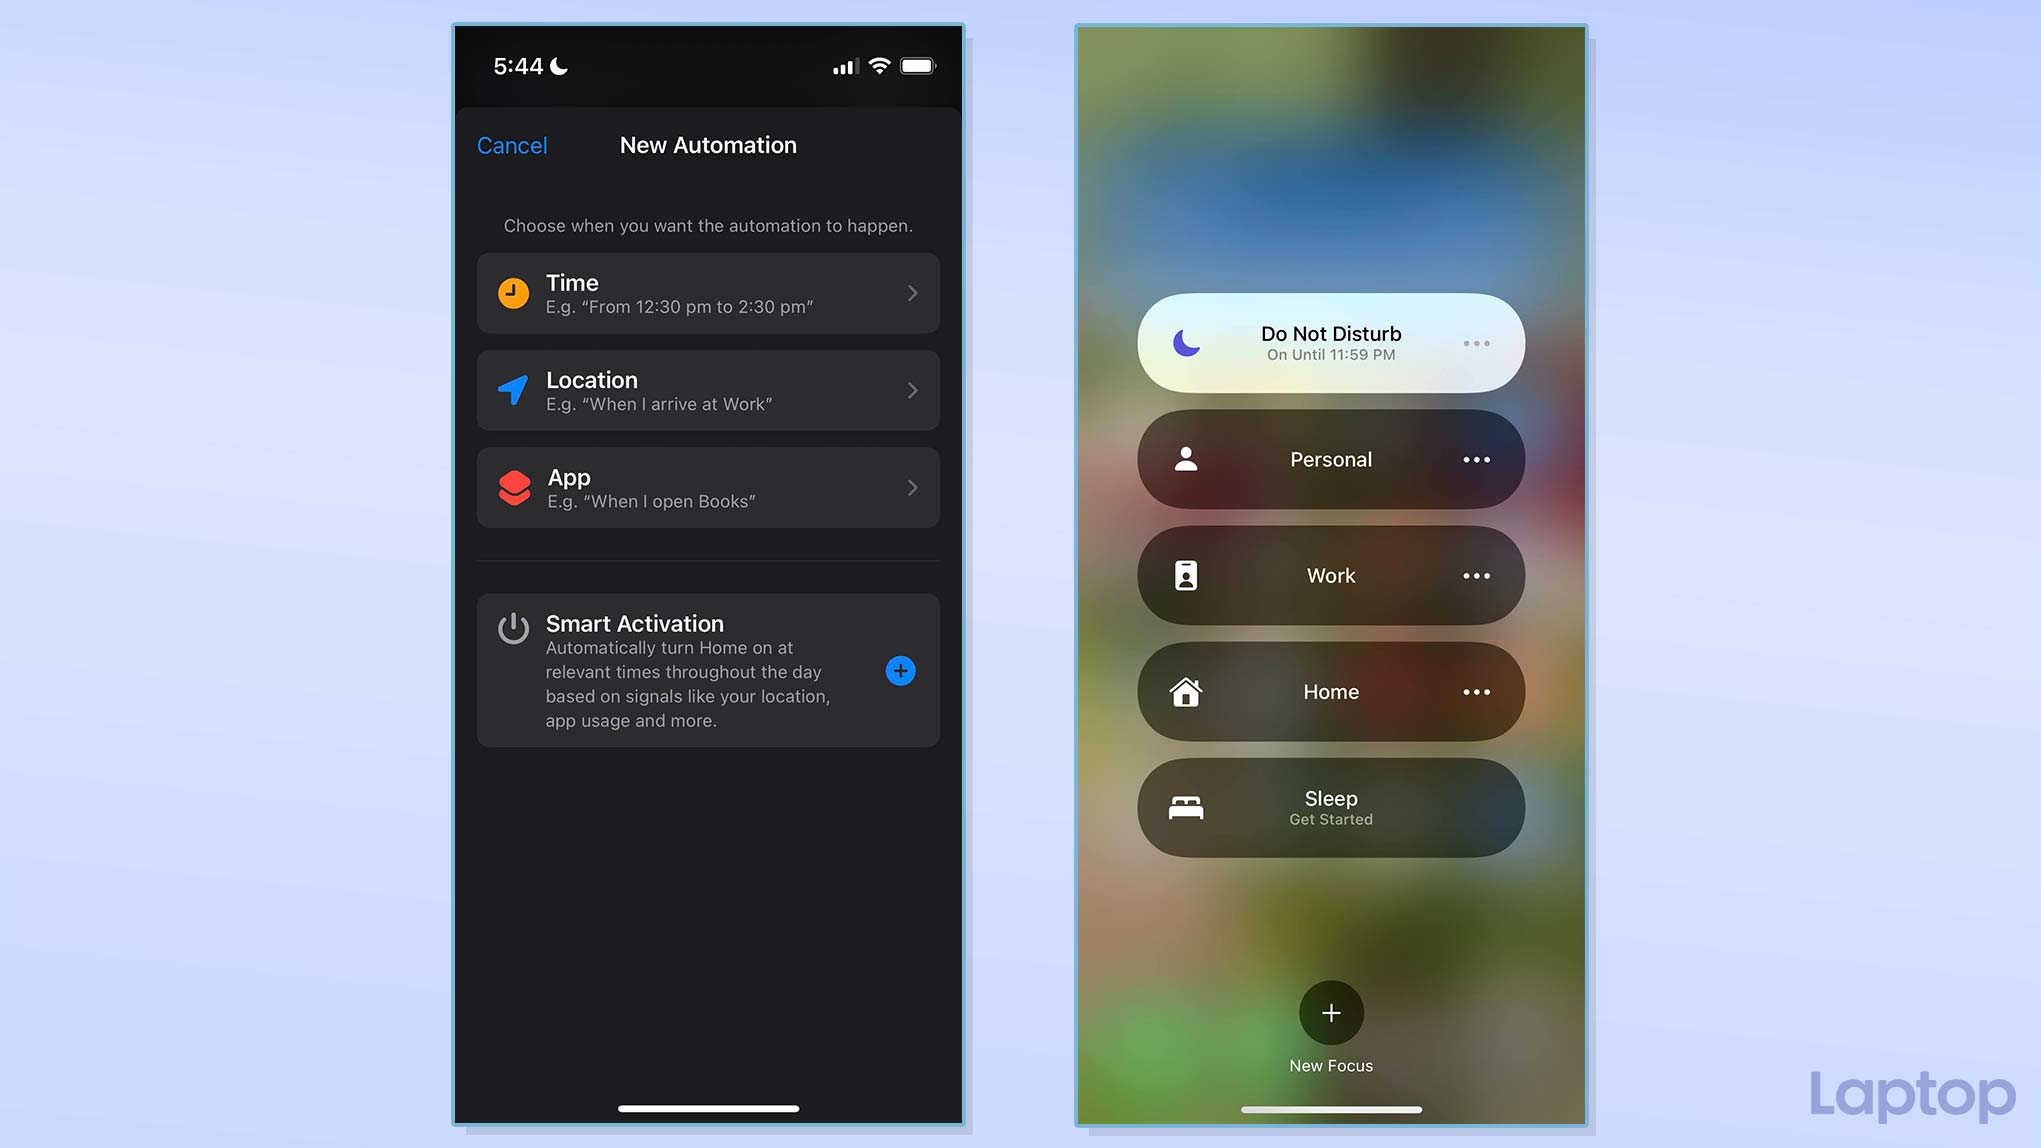
To configure a Focus profile to kick in automatically, go to Settings > Focus > [Profile Name], and head into “Add Schedule or Automation.” You can have it activated in a specific period, when you’re at a location, or when you open an app. Alternatively, you can enable “Smart Activation,” in which your device turns on the Focus profile based on your habits.
Set up Focus profiles on Mac
Editor’s Note: At the time of writing, Focus was only available on macOS Monterey’s beta version. You can install it on your Mac right away or wait a few weeks for Apple to release it to everyone.
Focus can keep distractions at bay on macOS as well. You can sync your profiles from an iPhone or iPad with your Mac with the “Share across devices” toggle under Settings > Focus or create a new one just for your computer.
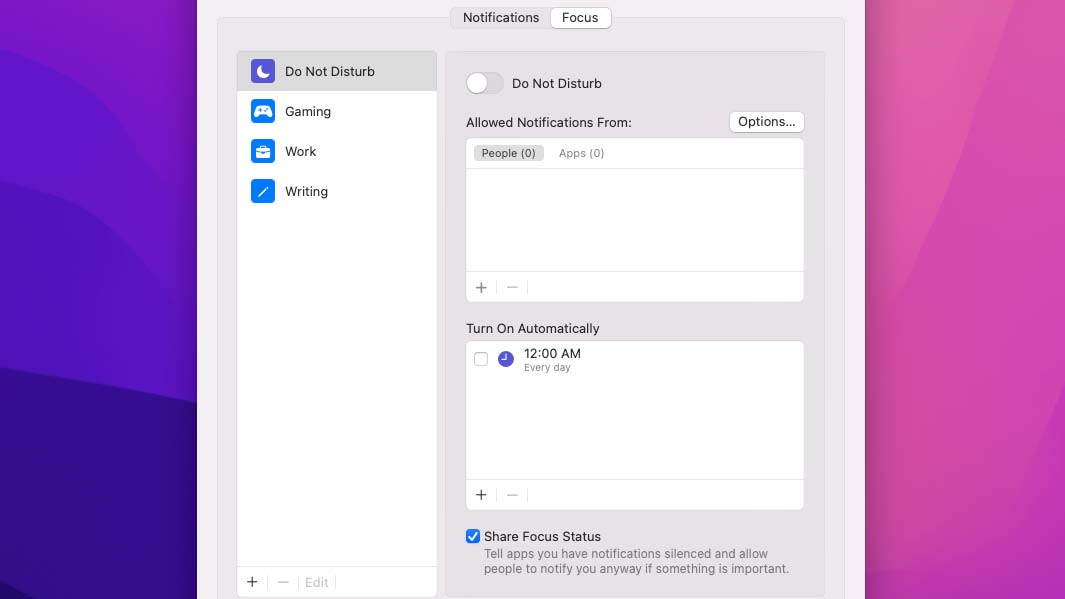
Navigate to System Preferences > Notifications & Focus on your Mac and enter the “Focus” tab.
Click the plus button at the bottom left corner to build a new Focus profile and select “Custom.” Similar to how you can on an iPhone or iPad, you can pick the people and the apps that can notify you during a Focus. You can allow people or apps with the plus button under the “Allowed Notification From” section.
Focus on Mac can also turn on automatically based on time, place, or an app launch. Set this up with the plus button below the “Turn On Automatically” box. To enable a Focus manually, click the Control Center button on the menu bar and then select “Focus.”

