MacOS offers a treasure trove of features for creators. One of our favorites is Preview, the lightweight photo editing application baked in to each version of Apple’s desktop operating system.
Preview is a built-in PDF and image viewer that lets you make simple edits, convert images, and resize them without opening up more robust editing applications. Within the application, you can make basic adjustments like cropping, resizing, annotating, or changing file types — and often before your bulkier photo editing suite even loads.
Aside from editing, there are a handful of pro-level features that allow you to sign PDFs or password-protected documents on the fly.
But today we’ll look at two simpler functions: how to resize and convert an image.
Resizing images with Preview
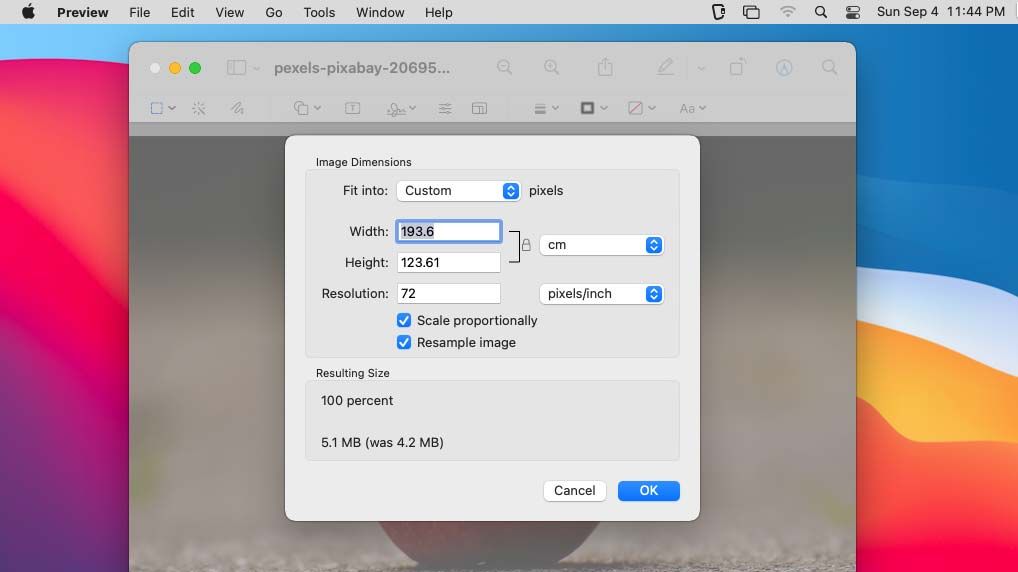
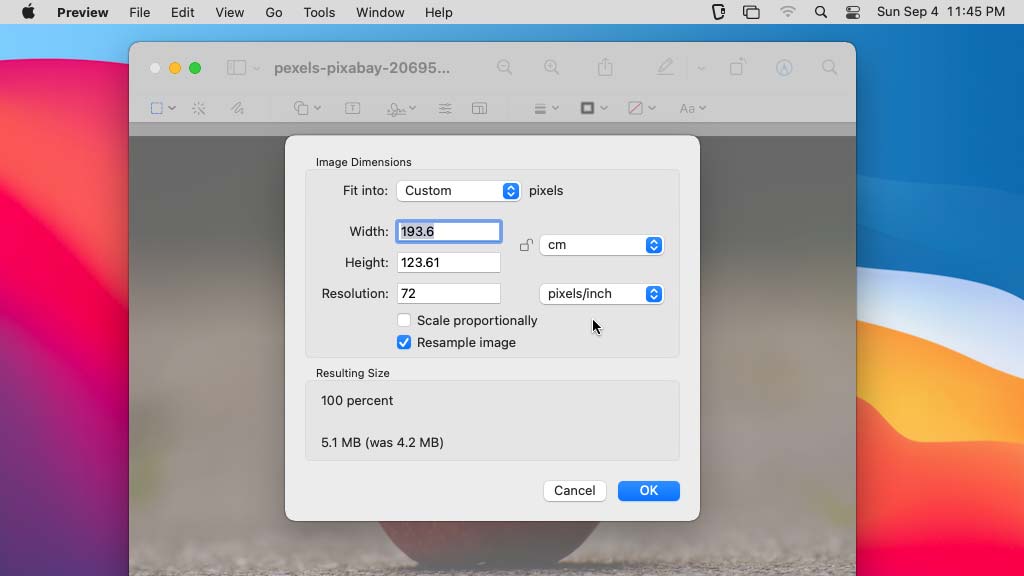
1. With your image opened in Preview, go to Tool > Adjust Size… on the menu bar. A window should appear.
2. Under the image dimensions section, enter your preferred width and height for your image.
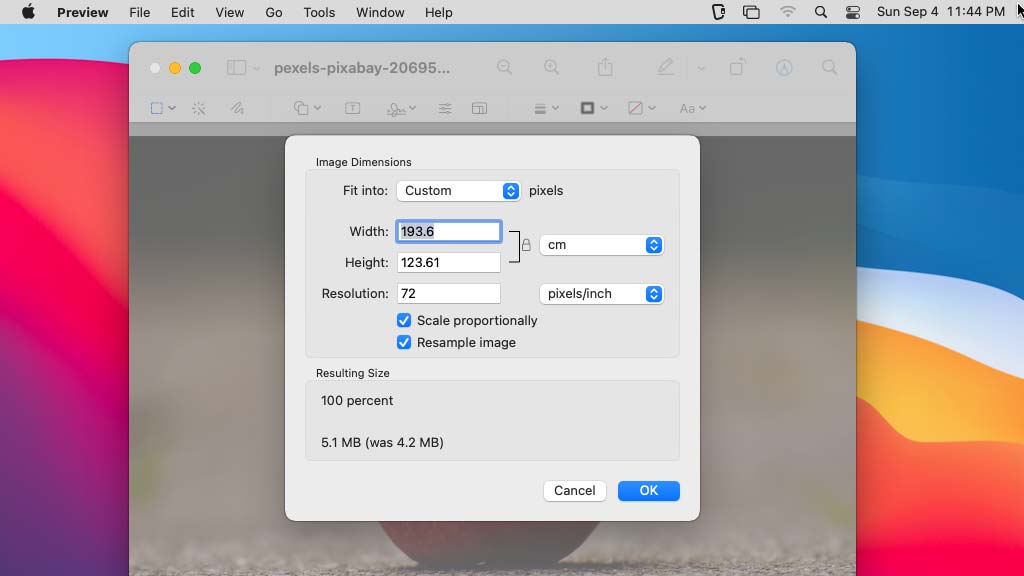
3. Click the lock icon or untick Scale proportionally to let Preview disregard your image’s aspect ratio.
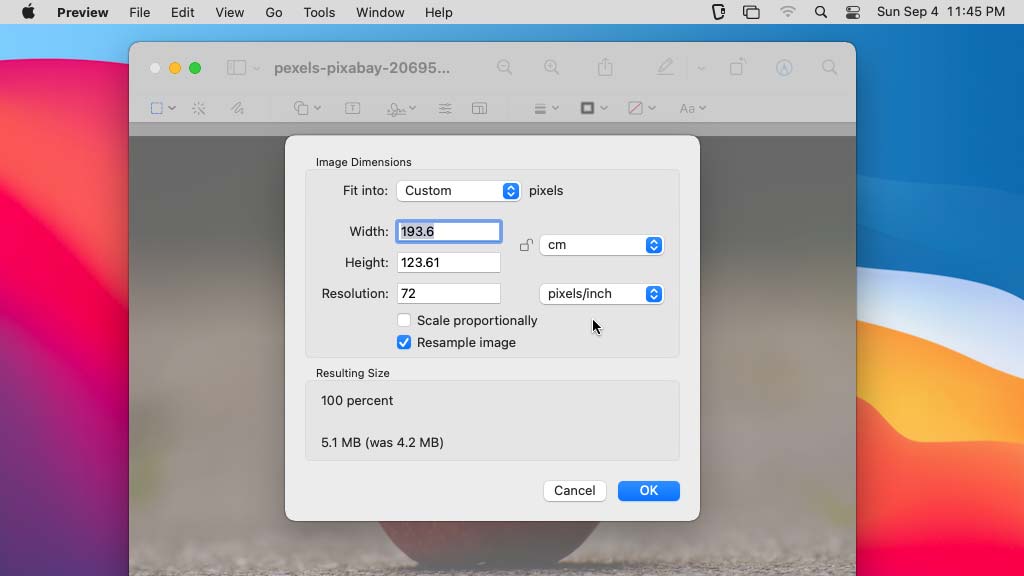
4. Click OK.
Converting images with Preview
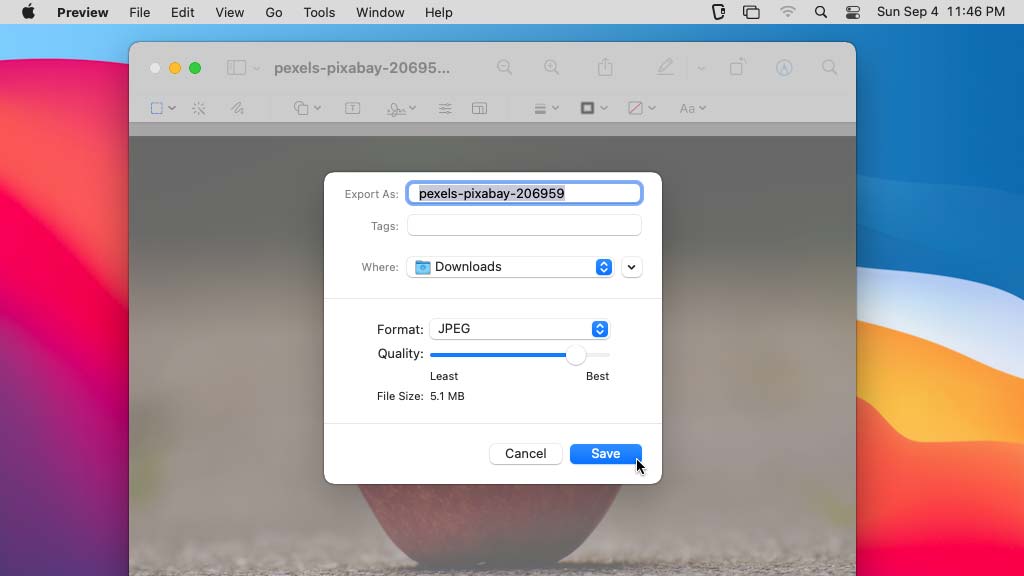
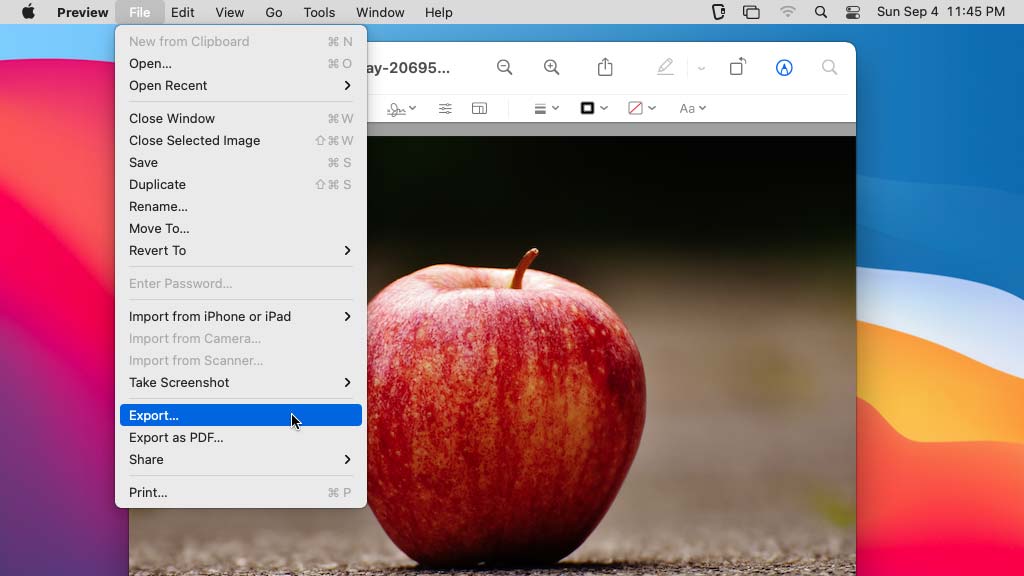
1. To convert your image to a different image file type, go to File > Export… in Preview’s menu bar.
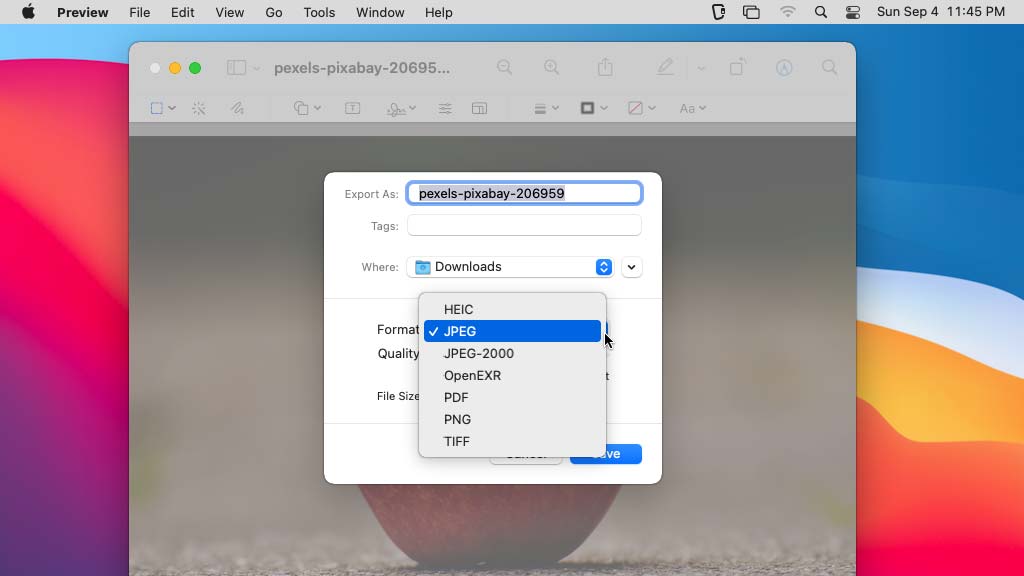
2. Select your preferred file type in the Format field. The dropdown will only show you available file types.
3. Select where you want to save your new file in the Where field. This field defaults to the location of your original image.
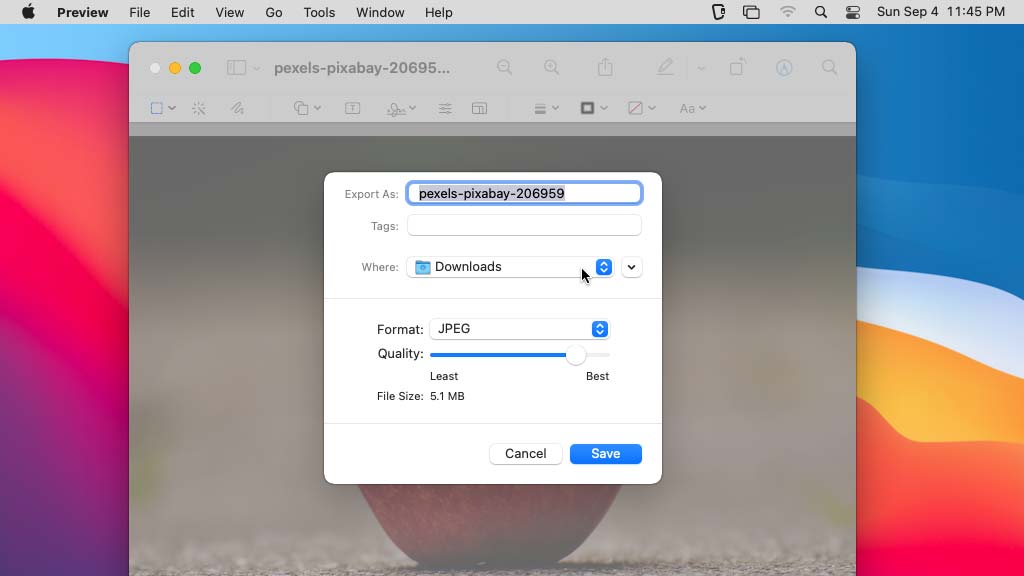
4. Lastly, click Save.
